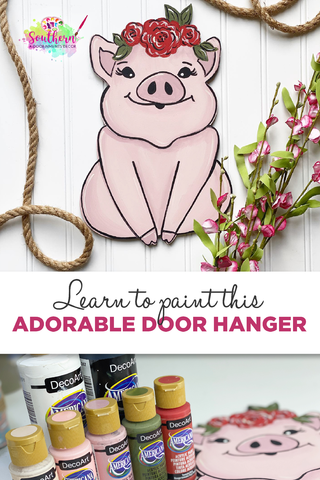
Learn How to Paint this Cute Floral Pig!
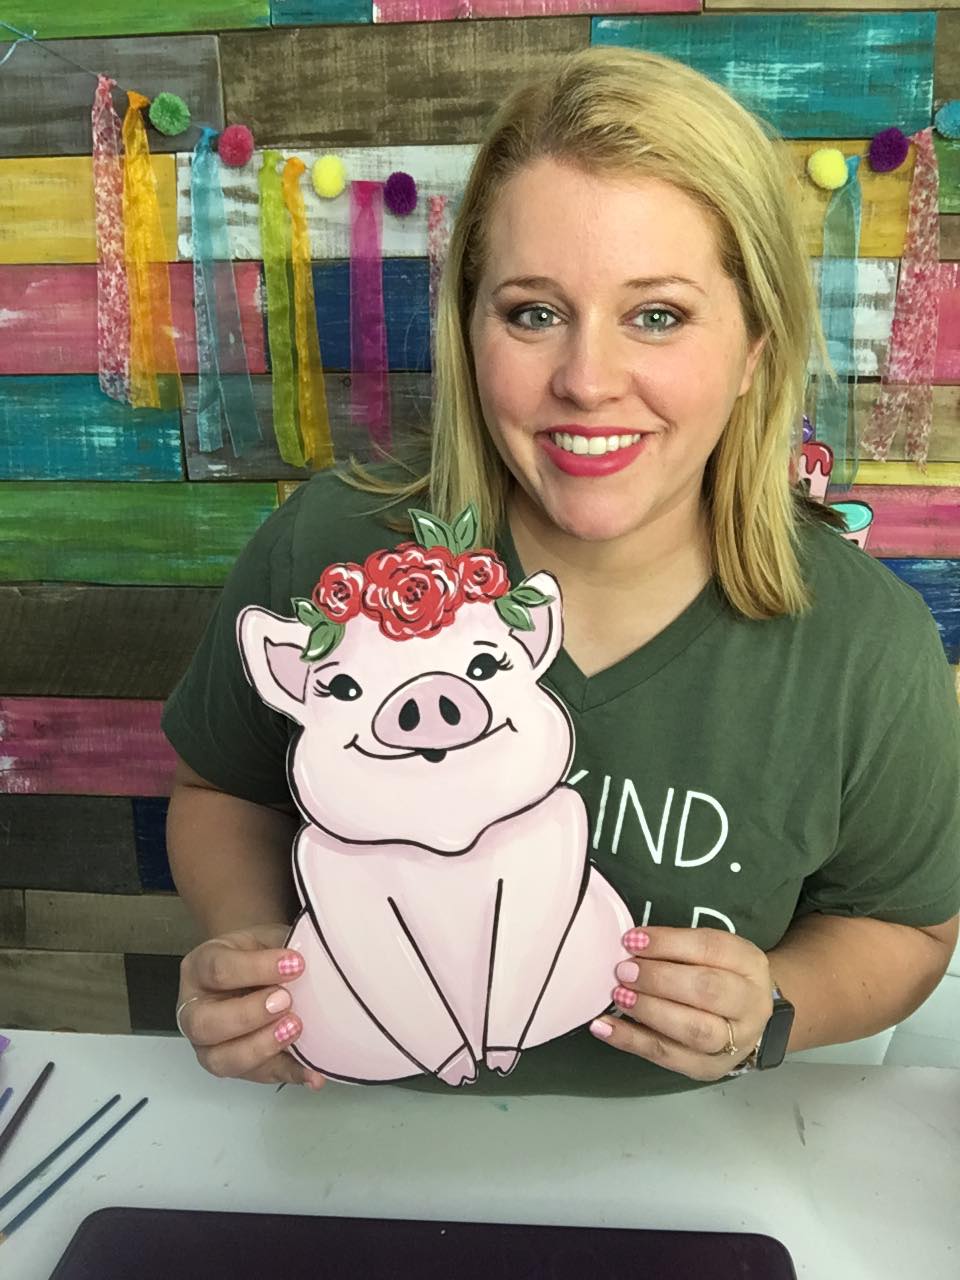
Isn’t this pig with her floral crown the cutest thing?! I just love her and was so excited when it became clear y’all loved her, too! When we introduced our farmhouse animals collection, I had so many requests to paint this little darling, that I decided to paint her live on Facebook and to tell you all about it here, too. I’ll take you through shading techniques that will allow us to make her perfectly, plumply, and pleasantly pink!
And if you love this sweet piggy, make sure you check out all of the other designs in our floral farmhouse collection!
Supply List
- Small Flat Tip Paint Brush
- Small Round Tip Brush
- Floral Pig Door Hanger Blank
- -OR- Floral Pig Printable Template and Digital Cut File
And DecoArt Matte Acrylic Americana Paints:
-
- Black
- Sugared Peach
- Cotton Candy
- Blush Pink
- White
- Tomato Red
- Light Avocado
- DecoArt Matte Fluid
Note: Affiliate links included within this post for your convenience. As an Amazon Associate, I earn from qualifying purchases.

DIY Your Own Floral Pig Door Hanger
I started with a ready-to-paint cutout blank that is etched. The etching makes it easy even for beginners! It’s just like paint-by-number kits you did as a kid. But you can also cut out your own door hanger at home using my printable template and digital cut file.
Not sure which one to use? Check out my blog post where I share the differences and help you decide if you should use a template or ready-to-paint blank cutout.
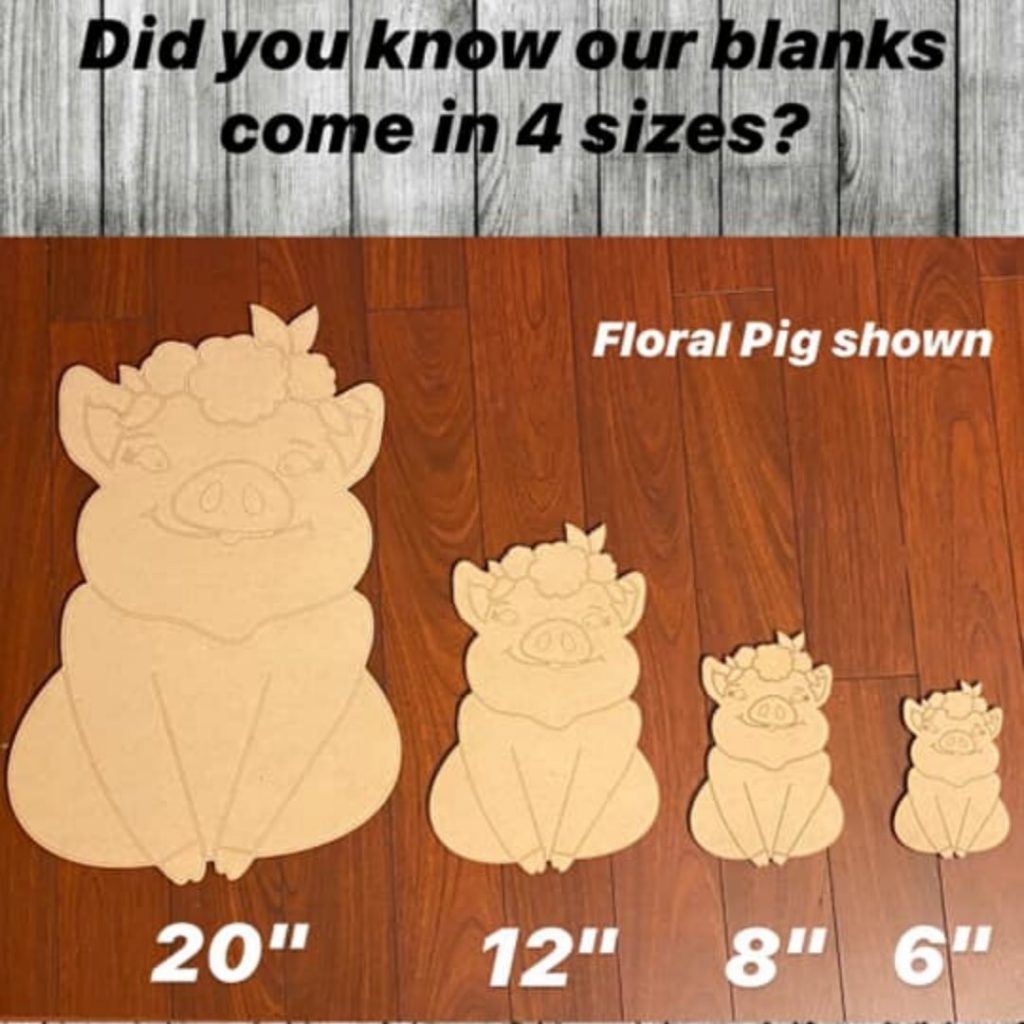
Here, I’m painting a 12″ size cutout blank of the floral pig. It’s smaller than the 20″ I usually use. This size is perfect for a wreath attachment or kitchen wall sign. It also makes a precious door hanger for a child’s bedroom door. My favorite way to use this size is as an attachment to my six foot tall porch welcome sign. Using velcro, I like to swap out different 12″ door hangers in place of the “O” in welcome. This piggy is perfect for summer. So cute!!
Pick Your Perfect Pig
So we’re painting the 12″ size today, but in my shop, you can also choose several other sizes for this adorable floral pig , depending on how you want to use your project in your decor. We have sizes from a full-sized mama pig down to a little piglet:
- 20” for door hangers
- 12” for porch welcome sign attachments
- 8” for door hanger attachments
- 6” for ornaments or wreath attachments
Grab Your Supplies and You’re Ready to Go!
When we’re painting this little piggy, I want you to think about how we ladies put on our makeup. We have a base coat, and then we come back and do some highlighting and contouring. That’s exactly what we’re going to be doing with our little pig friend to make her as pretty as she can be!
You’ll need three different pinks. I used Deco Art’s Americana in Sugared Peach (a warm, off-white), Cotton Candy (a bright pink), and Blush Pink (a soft, muted pink).
We’re going to start by applying a nice, even base coat with a smaller, flat-tipped brush. For the base coat, I ended up mixing my pinks to get just the right shade. Start with a half-and-half mixture of Sugared Peach and Cotton Candy. Then add just a tad of Blush Pink until it’s the shade you want it to be.
TIP: If you don’t have the color you need, Google how to mix the color you want.

The base coat should cover everything except the floral crown.
TIP: Using long brush strokes but your paint still isn’t smooth? You might be using too much paint, or maybe it is too thick. Try adding a little water to your paint if you need to thin it out.
Shading Our Little Pig!
Going back to our makeup analogy, the base coat was like our pig’s foundation. Now to bring attention and definition to her features, we’re going to highlight and contour.
For our second coat, we’re going to use Blush Pink. We’ll use this on areas that we want to look slightly lighter and brighter, like her arms as well as around the edges of her little butt.
Switch to an angle tip brush and, using a darker shade, add some contour to her shoulders and under her chin. You’ll blend out the lines as you work, which is a technique called shading.
When you’re shading, it’s important to work with paint that is still wet. I like to add a little matte fluid medium, from DecoArt to my paint. It keeps it from drying as quickly. You can also blend with a bit of water if you don’t have matte medium.
Shading can be intimidating, but it doesn’t have to be. Check out this video where I paint another floral farm animal – this time a cow. I explain shading tips and techniques in detail.
TIP: Work in small areas when shading. This allows the paint to stay wet which makes for much easier shading.

Our Pig’s Floral Crown
Right under the flowers, where there would be a shadow on her face we need to shade with a darker color. Now, we’ll highlight the outer edge of her ears.
It’s time. Flower time! Let’s get going on painting our pig’s floral crown. We’ll use Tomato Red for the flowers. I think this rich, deep red compliments the tones of her face. Use a little, flat-tipped brush to paint the flowers.
I chose Light Avocado for the leaves. Once we’ve painted the flowers and the leaves, we’ll go back and add highlights to our floral crown with white and black dots.
Finishing Up the Floral Pig Door Hanger
Finally, use some black on a small, round tip brush to add highlights and accents. I outlined the door hanger and also areas I wanted to define like our pig’s arms, ears, and under her chin.
And don’t forget to outline her feet. Those piggy toes are too, too cute!

Check Out the Video Tutorial
And if you already follow me on facebook, I hope you caught my video tutorial of this floral pig door hanger when I originally painted it live. If not, make sure you watch it now and I’ll show you exactly how I painted mine, step-by-step:
Once you’ve finished your floral pig door hanger, make sure you share it in my free facebook group for painters! One of my favorite things is hanging out on facebook with all of you and getting ideas and inspiration from everyone.
If you’re ready to start right away, you can always find the painting supplies that you need in my online shop or Amazon door hanger supply storefront. Then just grab the floral pig door hanger blank, or printable template and digital cut file, from my online store:
Love this Pig Door Hanger? Pin & Save for Later:
Get the Help and Inspiration You Need!
Make sure you follow me on Facebook, Pinterest, and Instagram to get even more ideas, video tutorials, links to my favorite products, and lots of other fun stuff!
And don’t forget about our Painters’ Clubhouse! Once you join, you’ll become part of a monthly membership group where we paint and learn together! From new techniques and painting tips, to getting access to exclusive content all month long, it’s the best place to grow your painting hobby together with us! Make sure you get on the waiting list so that you’ll be one of the first to have an opportunity to grab a spot when membership opens again. It only opens twice a year – you won’t want to miss it!
Free Stuff!
I hope you loved learning about how to paint this adorable floral pig. But I also wanted to talk to you about my FREE template library. It’s a library filled with FREE templates of some of our most fun and most favorite door hangers.
But that’s not all! For each template, there is a FREE video tutorial you can watch where I teach you how to paint that door hanger. And there you can also purchase a blank door hanger if you are not quite ready to cut your own.
To get your hands on all of this FREE door hanger magic, click here.
Need Help to Get Started? Grab My Free eBook!
Are you a beginner to the painting world? I know it’s intimidating to get started when you’re just starting to paint door hangers! That’s why I created my free eBook, Door Hangers 101, just for you!
I’ve included everything you need to know to get started, links to video tutorials, my favorite brushes and paints, how to pick the best wood for door hangers, and more! And did I mention that it’s free? Go get yours right now!


0 Comments