
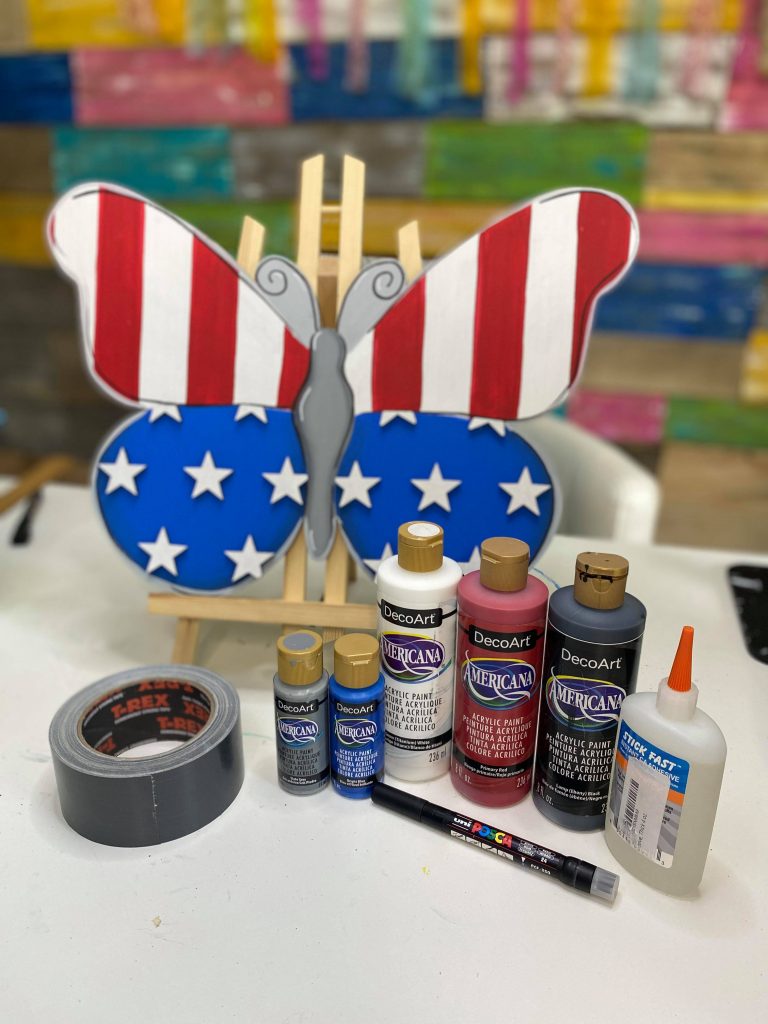
Supply List
- Patriotic Butterfly Template OR Patriotic Butterfly Door Hanger Blank
- Ruler
- Pencil
- Black 3M Posca Paint Pen
- Tape – if using wooden attachments
- Sponge Pouncer
- Stick Fast Glue
- White 3M Posca Paint Pen
- Black Posca Paint Brush Pen
- 1 inch flat tip brush
- 1/2 inch flat tip brush
- Wide Brush
DecoArt Americana Paint Colors:
Note: Affiliate links included within this post for your convenience. As an Amazon Associate, I earn from qualifying purchases.
Gather Your Supplies
Before we get started, it’s important that you gather everything you need. If you’re comfortable cutting your own door hanger, you can purchase the template and digital cut file directly on my website. If you’re cutting this design out at home, you can cut out the stars separately and create a 3D effect like I did! I have a blog post on how to cut 3D elements with a Thunder Laser, if you have a laser cutter, this might be a helpful post for you!
The Patriotic Butterfly blank is available in my shop as well and is a great option for the painter who might not feel comfortable cutting the design out themselves. The blank is even sold as an etched option making it easier to paint.
Paint the Background of the Patriotic Butterfly Door Hanger
To get started, we are going to paint the background of our door hanger.
- Using a one inch flat tip brush, paint the top of the butterfly wings using white paint.
- Paint the lower half of the wings using the color Bright Blue.
- Switch to a smaller flat tip brush and paint the center of the butterfly using the color, Slate Grey.
- Once the first coat is dry, add a second coat of Bright Blue to the butterfly wings with a wide brush. Avoid rinsing your brush as you can use this paint to shade in the next steps.
Blending and Shading on the Patriotic Butterfly Door Hanger
Now that the background is painted, it’s time to add some shading. You’ll be surprised to see how big of a difference the shading makes when it comes to painting the door hanger and making it look polished.
- While the blue paint is still on your brush, dip the tiny corner in black and start to shade along the bottom of your butterfly wings. If it’s not blending, add a little bit more blue. Be sure to keep the corner with black on it to the outside of the butterfly wings.
- Switch to the 1/2 inch flat tip brush and add a second coat of grey to the center of the butterfly.
- With a teensy bit of black on the corner of the brush with gray paint on it, and pull it down the sides of the butterfly center and shade it by adding more grey paint if needed.
- Mix Slate Grey and White to mix a lighter shade of grey. Paint the butterfly antennas with this lighter grey.
Add Some Stripes to the Patriotic Butterfly Door Hanger
Sticking with our patriotic theme, it’s time to paint some stripes on our door hanger. Be sure to grab your ruler and pencil before you start painting.
- Using the ruler and pencil, draw vertical stripes on your butterfly that are the width of the ruler.
- Using a 1/2 inch flat tip brush, dampen your bristles and pick up some Primary Red paint to paint every other stripe.
Paint the Stars
This is the point in the tutorial where it might differ based on if you are using 3D Elements or a flat blank. I used 3D elements in my tutorial so I’ll be explaining how to paint the attachments. If you didn’t use 3D elements, you can paint over the etched stars with white paint and a flat tip brush. You might need to do a couple of coats of paint so that it really stands out.
I recommend using tape to hold the 3D elements and make them easier to paint. Here’s what you’re going to do:
- Lay the tape down on the table, sticky side up, and stick the small star attachments to it.
- Using a sponge spouncer, paint the stars with white paint.
- Once the stars are dry, peel them off the tape and use Stick Fast Glue to glue them to your door hanger.
Add the Details
A door hanger is never complete without the final details! Grab your Posca Paint Pens and let’s add some final touches.
- Using a Black 3M Posca Paint Pen, trace over the antennas of your butterfly.
- Switch to a White 3M Posca Paint Pen and add some highlight to the antennas on your butterfly.
- Feather some accents along the edge of your door hanger using a Black Posca Paint Brush Pen.
- Finally switching to a paint brush and using the light grey paint, create an outline on the entire door hanger but be sure not to cover up your shading.
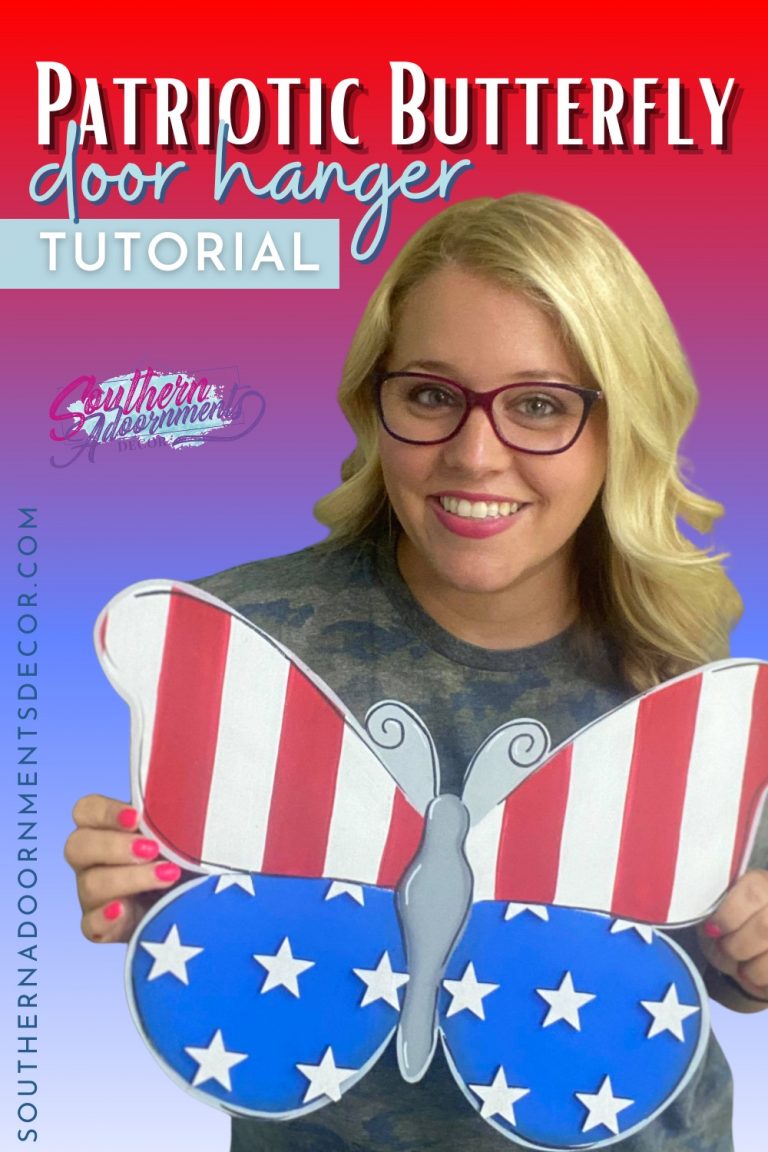
There you have it, your patriotic butterfly door hanger is complete! You can add a bow and hang it on your front door for a festive porch piece this summer! Not sure how to make a bow? Check out my blog post on “How to Make a Simple Bow.”
Watch the Replay
Looking for a more visual tutorial? You can catch the replay of this tutorial on YouTube below. It was so much fun to paint with you guys! Can’t wait to see how you remix this door hanger with your own style.
Related Resources
- Like my Facebook Page and watch my Facebook Lives every Tuesday!
- Join my Painter’s Clubhouse Membership and learn more techniques just like this one!
- Subscribe to my YouTube channel!

0 Comments