Using Stencils to Paint an Ombre Arrows Sign
![]()
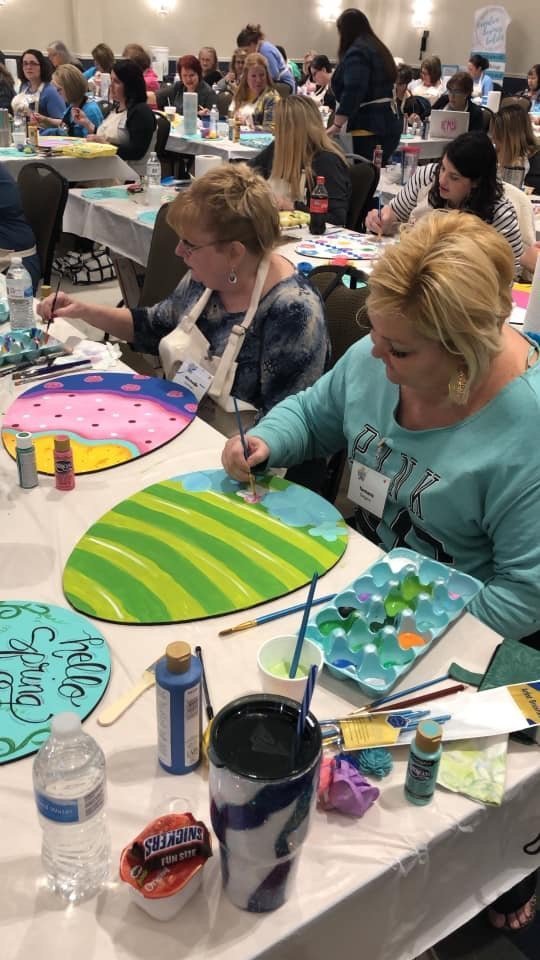
You all already know my love for DIY door hangers! Well, sometimes it’s fun to use those painting skills and make something new and different. This time, I wanted to personalize an inspirational piece of wall decor for my little girl’s llama-themed bedroom. So I decided to paint this ombre arrows wood sign for her room! And now I want to show you exactly how I painted it by using a stencil for the arrow pattern.
Supply List
- Flat Tip Paint Brush Set
- Small Polka Dot Sponge Brush
- POSCA Black Paint Pen
- Hair Dryer
- Arrows Pattern Stencil
- Wood Plank
(I just found a scrap piece of wood in our shed that was the right size)
And DecoArt Matte Acrylic Americana Paints:
- Cotton Candy
- Peacock Teal
- Coral Blush
- White
- Bahama Blue
Note: Affiliate links included within this post for your convenience. As an Amazon Associate, I earn from qualifying purchases.
![]()
How to Paint an Ombre Background Design
Ready to paint your own ombre arrows sign? Here are the easy steps I used to paint mine!
I decided to use four colors on my sign – two pink-ish tones and two blue-green tones. I used a wide flat tip brush for the ombre background.
I planned to paint my darker pink color, coral blush, on each end, then fade to the lighter pink. Then, I wanted to transition to my aqua color, Bahama Blue, and finish with the darker turquoise Peacock Teal in the center.
First, I painted my outer strips of coral blush. Then, without rinsing my brush, I just overlapped with a new coat of the cotton candy pink and pulled it out towards the middle. Here you have to work quickly so that the paint doesn’t dry! You want to be able to go over it and blend the lighter with the darker.
(Don’t forget to paint the edges to match!)
TIP: If you are a slower painter, or you just want to have a little more time to blend, you can also add a little Matte Medium to your paint to help it stay wet longer and blend more easily.
Next I added my teal color. It’s a little trickier to get the blue transition to blend with the pink and coral tones, so just take your time and slowly go over it. You can rinse your brush and add some more coral, too, to help the transition.
I finished in the center with the darker turquoise. I blended from light to dark to transition the colors. Then I let it dry completely so it’s ready for the stencils.
TIP: You can use a hair dryer to speed up the process!
Hand Lettering and Arrows on Top of the Ombre Sign
Now it’s time to use the stencil on the sign to add the arrows detail on top of the ombre background!
Line up the arrows stencil and dip your foam sponge pouncer into the white paint. Gently dab the sponge over your stencil. Don’t get too much paint on your brush or it might seep under the stencil and smear your design.
Next, gently lift your stencil – voila! You have arrows! Give it a quick dry with your hair dryer so the paint doesn’t smudge.
Now line the stencil back up on the rest of your sign to repeat your steps and finish the pattern.
![]()
![]()
After stenciling, I let the last coat dry completely.
I decided to use an inspirational phrase, “Just Be You” to personalize the sign for my daughter.
Then I used a pencil to hand letter the phrase onto my sign.
Once I was happy with the hand lettering, I grabbed a Uni POSCA paint pen size 3 2.5 mm in black to trace over the letters.
Once I had the outline of the letters in black, I went back to thicken the letters where my hand would naturally do a downward stroke. This made a nice calligraphy effect.
Your Ombre Arrows Sign is Ready to Hang!
![]()
And that’s it! This was a quick and easy project that I know my daughter will love in her bedroom. And it is so easy to match the colors to her room decor and personality. If you want to use your sign outdoors, or just want the finish to be a bit sturdier, you could always add a sealant on top.
I hope you’re inspired to try some of your own DIY home decor! The stencils make it easy even for beginners.
I design my own stencils and cut them out myself. You can buy them right from my shop!
Or if you want to try cutting out your own follow my instructions here, and check out the supplies you need from my amazon shop.
You can also brush up on your stencil technique by looking over this post I wrote with five of my best stencil tips!
Check Out the Video Tutorial of the Ombre Arrows Sign!
If you already follow me on facebook, I hope you caught my video when I painted it live. If not, make sure you watch it now and you can see exactly how I painted my ombre sign and used the arrows stencil!
Plus, in this video I share some of the reasons that painting is so important to me, and what a blessing it has been to our family.
And those are some of the biggest reasons that I want to help you all! I want you to find ways to be creative and possibly make a little extra money for your family, too.
I know what it’s like to be a busy wife and mom, and feeling the need to have your own “thing”. Something that’s just for you. You just need a little reminder of who you are and how to rediscover yourself.
That’s why I want to encourage you to take a minute and try something new, just for yourself! Look back through my facebook live videos, and pick a door hanger to paint along with me. Keep an eye out for our upcoming March Door Hanger challenge and join in the fun! Or get on the waitlist now for our monthly Painter’s Clubhouse group – membership opens again in less than 50 days!
If you’re a beginner at painting a door hanger, I want to encourage you to visit my blog post for beginners. At first, painting might seem overwhelming. However, I want to help you feel confident about the craft you’re doing all while enjoying it!
Join Us for our LIVE Event!
Speaking of finding time just for yourself, I hope that you can join us in Nashville for our annual Southern Adoornments Decor – LIVE event!
We will feature business trainings for how to grow a painting and paint party business, and of course, two full days of nothing but crafting!
Here are the top reasons why so many people are already excited to join:
1) It’s a crafting retreat – it’s therapeautic and just what your busy life needs!
2) You feel connected to community – you will be surrounded by other amazing crafters and painters. Plan to laugh and create together all day!
3) Grow your painting skills – We’re teaching canvas painting and ceramic painting on top of door hanger painting! You could even make money by teaching these in your hometown!
4) Grow your business – get the best tips and plans to help your paint party or door hanger business succeed! Don’t get stuck in a business rut!

It will be three amazing days of time for us to craft, learn, laugh, eat, and create together!
Whether you’re a brand new beginner to painted door hangers, or are already running your own DIY door hanger business, we will have the inspiration and information you need!
Get ready to relax, recharge, and reconnect – and have a lot of fun doing it all in Music City! Plus you’ll learn from some amazing guest painters, win prizes, and bring home some awesome swag bags of free goodies.
Get all the details you need right here. Just make sure you sign up soon so we can save you a spot – tickets are selling quickly!
Right now, there are less than 40 left!
Get the Help and Inspiration You Need!
Make sure you follow me on Facebook, Pinterest, and Instagram to get even more ideas, video tutorials, links to my favorite products, and lots of other fun stuff!
Have you signed up for access to my FREE template gallery? Sign up and you’ll get access to download some of my favorite door hanger templates – for free! Ready for more? Join my new Template Club and get first access to all of my new releases every month, for one low price!
And don’t forget about our Painters’ Clubhouse! Once you join, you’ll become part of a monthly membership group where we paint and learn together! From new techniques and painting tips, to getting access to exclusive content all month long, it’s the best place to grow your painting hobby together with us! Make sure you get on the waiting list so that you’ll be one of the first to have an opportunity to grab a spot when membership opens again. It only opens twice a year – you won’t want to miss it!
Join Our Painters’ Clubhouse Waiting List Now!

0 Comments